Setting up your Howler step-by-step.
Please make sure your micro SD-card meets the requirements:
– FAT32 formatted
– Class 10, UHS-I (U1)
– A2 class cards do not work
– SanDisk’s ‘Ultra’ & ‘Pro’ line cards do not work
– We have best experience with 16GB and 32GB cards of low/mid range brands (i.e. Samsung, Kingston) with specs: class 10, UHS-1 (U1), V10, A1
– If you buy/bought a SD-card through our Kickstarter/webshop it’s properly formatted by us.
We strongly recommend to get a 16GB or 32GB card as the work out of the box and don’t involve reformatting that may go wrong.
If you still go for a 64GB+ SD-card, please re-format to FAT32. To re-format 64GB+ cards to FAT32 you may need to install 3rd party software on Windows. Use 32kb cluster size/allocation unit size if asked. We have good experience with this Windows program. For macOS users: use the already installed Disk Utility app on your mac and use “MS-DOS (FAT)” as format type. This will result in FAT32 format.
If you are still encountering problems after formatting the SD-card to above specs, please fill in the contact form at the end of this page describing your problem and SD-card your are using.

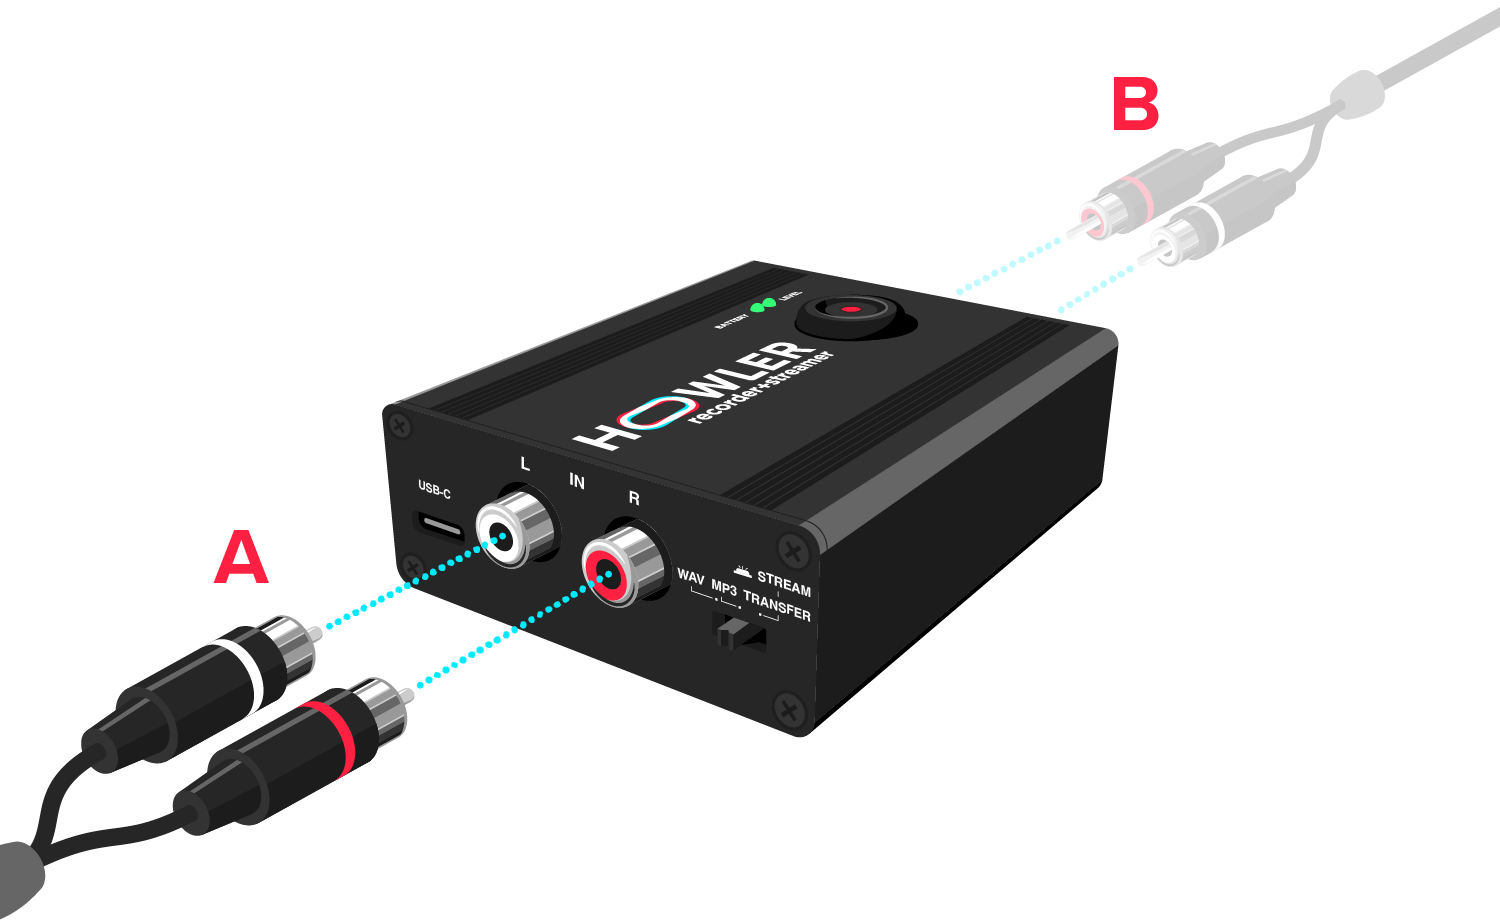
A) Connect the REC output of your mixer/device directly to the RCA input connectors of your Howler (IN).
B, optional) Don't have a dedicated REC out on your mixer available? Just wire any sound output of your mixer/sound device (i.e. Master/Booth) to your Howler's RCA IN connectors. Then wire the RCA output connectors of Howler (OUT thru) to the PA system.

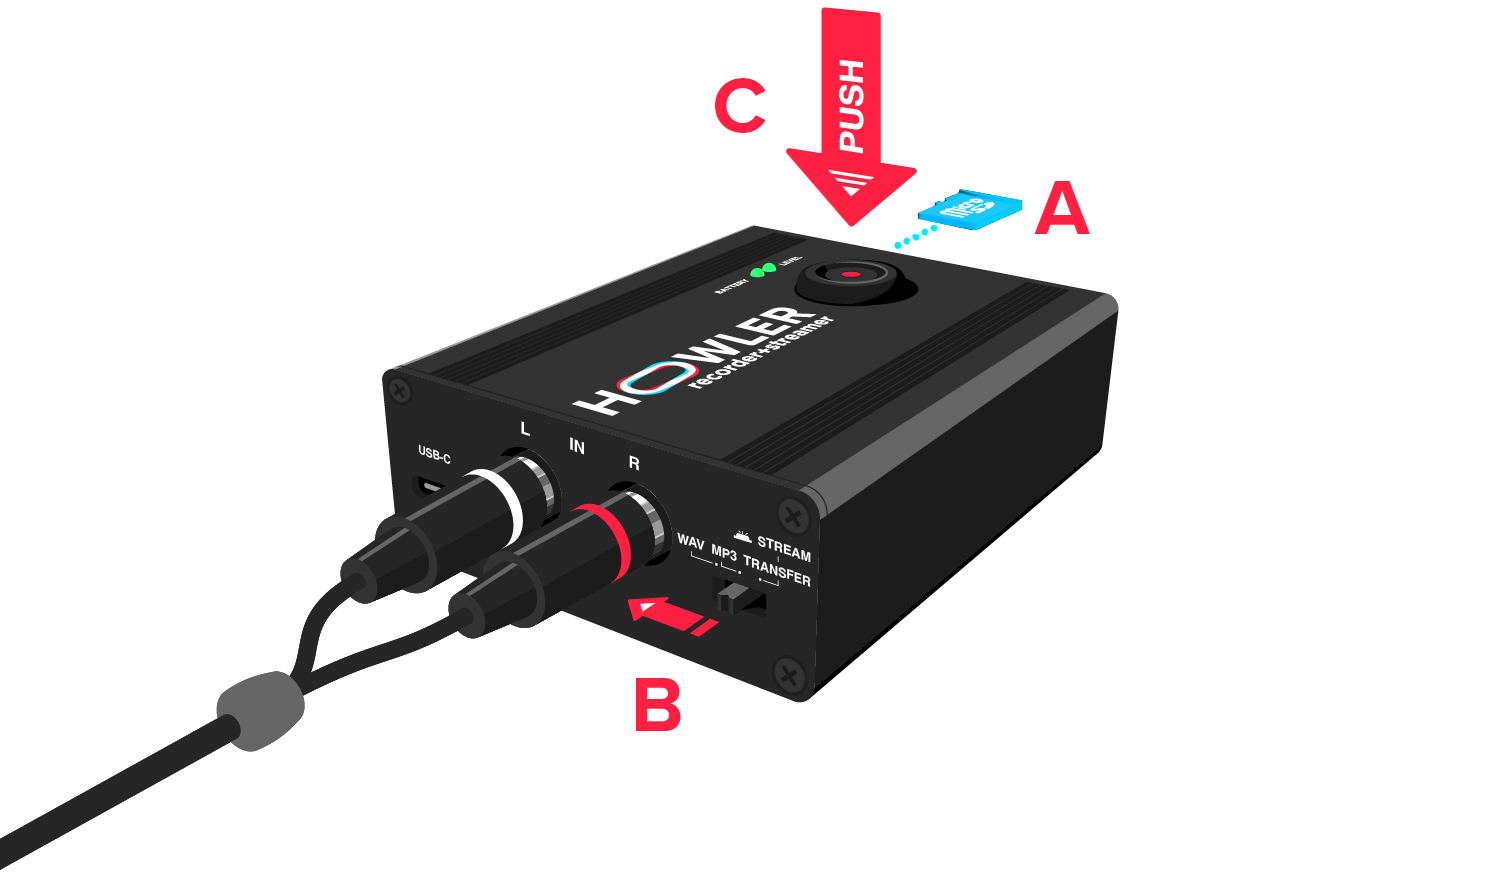
A) Insert your MicroSD card*. It can take up to 10 seconds before your SD card is initialised after inserting/turning on Howler.
B) Choose record format, MP3 and WAV using toggle B.
WAV is higher quality, but bigger file size of max ~3.5 hour recording (=~4GB file size). Will create a new recording automatically if SD-card is formatted at FAT32.
MP3 allows max ~40 hour recordings per file size (FAT32), and no recording duration limits on exFAT.
C) You're ready to record your musical masterpiece! Press the RECORD button (big push button on top) and start your performance. Good luck and have fun! To stop & save the recording, press the RECORD button again.
*MicroSD card must be in FAT32. exFAT may not work.
When starting Howler, the BATTERY indicator turns on and after a few seconds the RECORD button may quickly flash a few times indicating it's initialising the SD card. After this, Howler is ready to use for recording.
Howler is correctly recording when the RECORD button is blinking constantly, and the LEVEL indicator is blinking green. See the Indicator Colors section below for more information.

If your LEVEL indicator is blinking red then turn down the volume of the source sound to avoid clipping in the recording.
If the RECORD button stops blinking soon after you've pushed it, there is something wrong with the SD card, or the SD card is full.

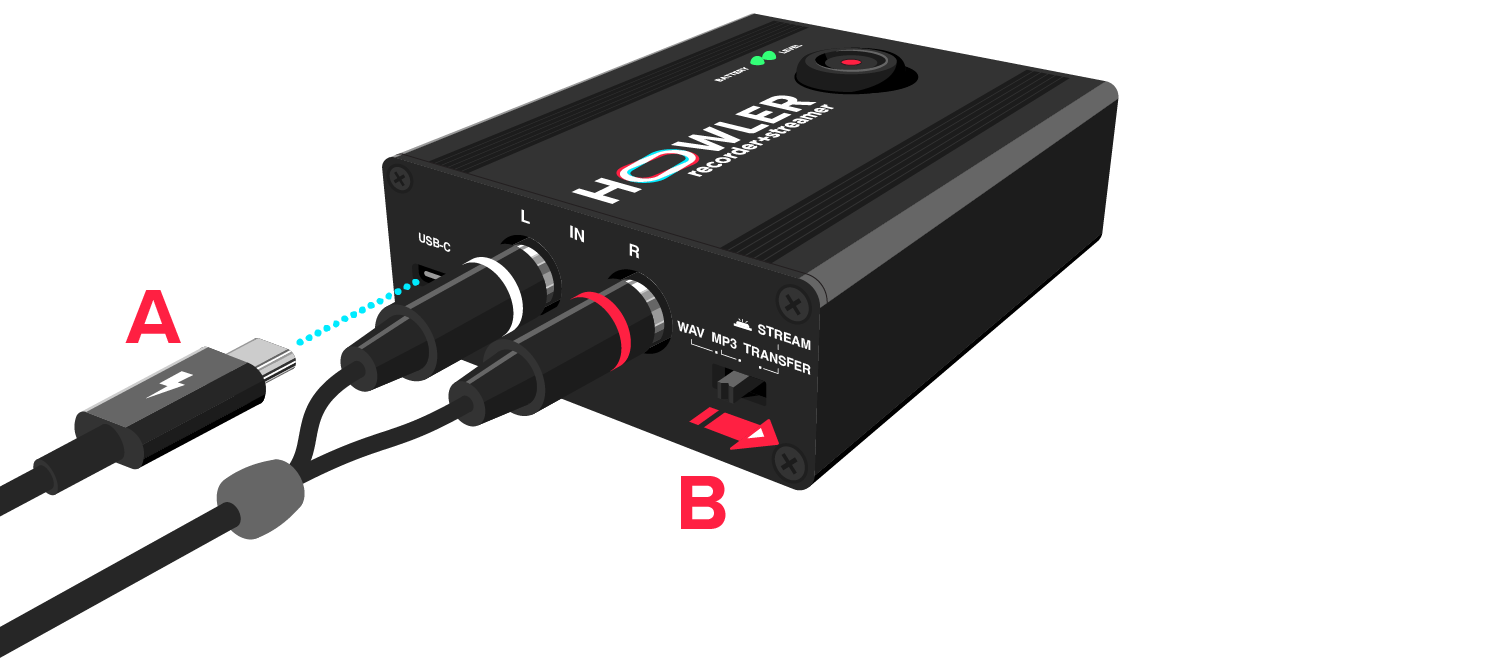
If you want to keep your smartphone charged while using your Howler, we've got you covered. Using the dongle you can connect both your Howler and a charging cable to your smartphone. Make sure to connect your Howler's USB-C port (A) to the left port on the dongle (B), the charger cable to (C), and plug the dongle's cable (D) into your smartphone.
Still can’t find the answer you’re looking for? Ask your questions via the form or send us a DM on social media!
© 2024 Howler Audio